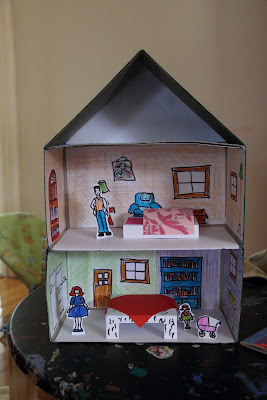
Here is something to do on a rainy day - a papercraft doll house.
You can use the following photos [which document my doll house construction process] to make your own doll house. All you need are two tissue boxes [or as many as you wish], paper, card, textas and pencils, scissors, sticky tape, ruler and paint. This sounds like a lot, but you can simply use any scrap paper or card you have about your house. Think green! For instance, to make the roofline you could use last year's Chrismas cards.
 |
| Cut off the top/lid of the tissue box. |
 |
| Tape together the two tissue boxes. Stick down trimmed paper for the floor and ceilings. |
 |
| Looking good. |
 |
| Draw on to trimmed paper some wall details. There are three walls per room/tissue box. Use a ruler to get an estimate of how much to trim the paper. Colour in the wall details. |
 |
| Print this template out and colour in. |
 |
| Print this template out and colour in. |
 |
| Print this template out and colour in. |
 |
| Print this template out and colour in. |
 |
| Print this template out and colour in. |
 |
| Print this template out and colour in. |
 |
| Stick the wall details into the tissue box. Fold scrap card in half and tape to the top tissue box, creating a triangular roofline. |
 |
| Still looking good. |
 |
| Oh yeah! |
 |
| Cut a triangle piece of paper/card same size as the roof, and glue to the back, thus creating an attic. |
 |
| Now you can paint the exterior of the house. If you have a variety of paints, try something creative with extra details - windows, doors, flowerbeds. |
 |
| With your left over card do some cutting and folding and you've got some basic furniture - like a bed or a table. |
 |
| Oh! And don't forget some little paper people to live in the lovely paper house. |
 |
| Tah-dah! She loves it. |
Drop me a line if you try this rainy day papercraft project. I'd love to see how it went.

