Showing posts with label sewing. Show all posts

Monday, 30 June 2025

News 2025:06:30

Upcoming: Kaleidoscope holiday program workshops

Warm up your child's creativity this winter with Kaleidoscope Kids. Kaleidoscope Kids is a school holiday arts program that encourages creativity through active learning, experimentation, artistic creation, and fun. Developed for 5-13-year-olds, Kaleidoscope Kids offers activities and workshops ranging from acting and music to visual arts and crafts. 

All sessions are guided by skilled artist-educators and supported by dedicated staff. There's something to inspire every child's imagination. Including...

Sew a Fox-tastic Friend with Melissa Gaggiano 

Join local artist Melissa Gaggiano in a fantastically simple, sew-fun workshop. Kids will learn basic sewing skills while creating their very own felt fox-face plushie. A fun and rewarding experience for all ages. All materials are provided. 

Workshop: Tuesday 8 July, 10am - 12pm
Admission: $25 + Booking Fee
Suitable for ages 5–13

For more information visit Kingston Arts website.


Friday, 26 July 2019

Book Week Prep + Fluff 'n' Stuff

{Kidspot: Book Week}
Book Week is cometh. Oh come on! No moaning, people! This is a walk in the park for cosplayers, and think of this as a warm up for Halloween. But don't you worry, because I've put together a craft video for making an easy as pie (Cherry? Apple? Chocolate?)super hero costume. Head over to Kidspot for the details.

Last weekend my family hosted a craft party, as part of Sew a Softie in July. The kids sat on the floor with baby blankets under them. My eldest supervised making Pusheen Mermaid softies. My youngest supervised making Kero (Cardcaptor Sakura character) softies. Home baked cherry-raspberry slice was served. And it was the easiest event I've helped the kids organise. In other words I let the kids handle the hosting responsibilities, while I rested and had a coffee in the backyard. It was a thoroughly enjoyable experience for all. One which the kids hope to repeat.


Sew a Softie

Friday, 14 June 2019

Today's Post is Brought to You by the Letter P

Why am I talking about the letter p? Because my recent content incidentally starts with the letter P. Such as paper doll... pom pom... and even pony.

Let's get into it so I can take you on a creative journey.


{My Poppet}
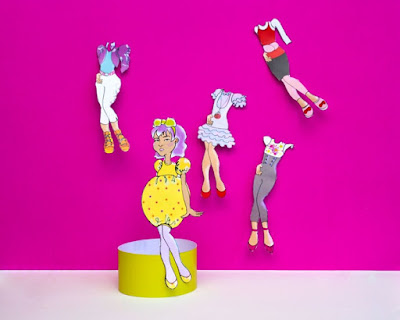
You will find my printable paper doll design over at My Poppet. For those who remember and loved paper dolls will appreciate this free printable.


{Kidspot}
Head on over to Kidspot. There you will find my hilarious Pom Pom Shoes DIY.


{this blog}
Then head back to my blog and you will find a sewing tutorial for a flying pony. It comes complete with instructions, and a video (should the instructions make no sense whatsoever ;)).

Saturday, 8 June 2019

Sew a Flying Pony


I have create a sewing project for you to try.  With the supporting content video and instructions you can make your very own Flying Pony. How neat is that?

Collect some materials, biscuits and a friend (or two), and get started making this cute flying pony. FYI, the wings can be moved.


You will need:
  • 3 felt sheets (different colours)
  • 4 buttons
  • Pen
  • Thread
  • Needle
  • Hobby fill
  • Dressmaker pins
  • Haemostat or chopstick
  • Craft scissors

Steps:

1. Copy and print the below template, and cut out the pattern pieces.


2. Place the pattern pieces on felt. Draw outlines of the pattern pieces onto the felt.
Felt 1 – body, ears.
Felt 2 – tail, mane, fringe.
Felt 3 – wing.

3. Cut out the drawn felt pieces.

4. Pin the fringe, ears and mane to the top of a body piece, as per the body pattern reference markers and plain stitch together.

5. Roll up the tail piece along the length, pin it and plain stitch closed.

6. Pin together the two body pieces, with the fringe/ears/mane sandwiched between.

7. Sew along the body perimeter, 3-5mm from the edge. Keep the horse bottom open.

8. Stuff the body with hobby fill.

9. Slip the tail into the bottom opening and pin into position. Sew closed the bottom opening, making sure to stitch into the tail.

10. Stitch one button into either side of the horse’s head, as per the reference marker. The easiest way to do this is to feed the needle from one side of the body to the other, through the holes in the buttons.

11. Layer and pin each pair of wings. Plain stitch lines into each wing piece, as per the reference markers.

12. Position and pin the wings onto either side of the horse’s middle, as per the reference marker. Stitch one button into either side of the wing, as per the reference marker. Do this by feeding the needle from one side of the body to the other, through the holes in the buttons. You now have your very own flying horse.

Wednesday, 8 May 2019

Kidspot Will Have You Charmed This Mother's Day

KIDSPOT – MOTHER'S DAY CRAFT
The past few days I have been in full project mode. Those are the best times – producing work that is both pleasurable and challenging. As an added bonus, the creation process is a form of renewable energy as it feeds both my drive and imagination.

So what have I been working on lately? It is charming! It is lovely! It is a Kidspot – Mother's Day craft project. Head on over to Kidspot to find out how to make this sweet charm.

What else is happening in the land of Melissa. There's lots of brainstorming, chats with the little one about making a fairy village in the garden. We've already got a miniature prayer statue back there, so there really needs to be a village to go with it.

Catching up with an old friend, sparked an idea for a 'date night' outfit. Think twin flamingo shades, pom-pom shirt, with matching wedge sandals and toe nail polish. If the outfit makes your date turn and run, I say it wasn't meant to be.

Friday, 26 April 2019

Play Clay, Hey!

© Melissa Gaggiano

The past six months we have been composting, and fantastically it really has cut back so much garbage waste. To give you an idea: before composting, on average we were going through 2-3 bin bags a week; Now we are averaging 1 bin bag a week.


In lots of tiny little things we find ways to save and reuse materials which would otherwise make it's way to the bin. For instance, the Big Bunny has recently been visiting and done his annual dump... of foil covered chocolate eggs. I have this funny habit of balling up the foil while eating said chocolate. And wouldn't you know it, I got the idea that these balls/cubes of foil could be used for beading. So guess what we're saving from the rubbish pile this year.


We love playing with felt. As materials go it's perfect for everyone regardless of what you're sewing skills are. It doesn't fray, is generally speaking tough stuff, and comes in so many cheery, bright colors.

My youngest will often be in the mood for sewing. Out comes the felt box and off she goes whipping together a jacket and pants (pictured above: I wish this came in my size.).


A huge part of the creative construction in my home has been centered on what can be done with paper and fabric. For some time my youngest has wanted to get more into clay exploration. So this week we finally made that happen with air drying clay (bought from Riot Art).

Our approach to clay play is the same for any other craft medium, which is fairly unstructured: Make what you want to make. If it doesn't work, try a different approach. If it still doesn't work, we'll superglue the broken bits later. I find the kids are more likely to persist if someone's not critiquing the crap out of their development. Having said that, some of the things that the kids want to make can turn into a collaborative event – this is when they want/need a little guidance. It's good for me too, just sitting with them, crafting away at something. We're creating memories together.

Right now I've got the clay pieces fast drying on heater vents. The clay will be ready to paint when school is out.


Monday, 22 April 2019

Bunny + Egg = Buggy

 
© Melissa Gaggiano

The Easter weekend arrived, and there were some last minute crafting activities.

I blew an egg, and turned it into a bunny. The knack is to not pop your eardrums in the process. The kids loved the result, and wanted to make their own.

We had a grand plan to attend a public Easter egg hunt, but holy bunny-egg, you should have seen the queue. The kids were a bit disappointed that didn't happen, but when we got home I hid the chocolate merchandise so they could find it 'again'.

For the egg hunt I made the kids Easter baguettes. I used felt, craft glue, needle, thread, scissors and a sewing machine. Technically these bags were a draft. Got it on the first go! 

© Melissa Gaggiano
© Melissa Gaggiano
© Melissa Gaggiano


Sunday, 20 January 2019

Bonus: 10 Min Drawing + Weird Wonders

{My Poppet link}
Welcome to the Bonus blog update. Some things dropped into my 'get excited' box, and I really couldn't wait till next Friday to mention them. So let's get to it, shall we?

A while back I created and wrote about a Drawing Project, which you can at last read about, over at My Poppet.


Previously, my youngest made some weird wonders, which I took the liberty of photographing for posterity. I enjoy watching her sewing development.


Friday, 23 November 2018

Rubik's + Gameboy

Felt crafted Rubik's cube
by Melissa Gaggiano
This week might have been a lost week, if not for the impromptu sewing projects, which are photographed here.

The week began, with my finishing a major project (which at the mo' is still hush-hush). The project is now in the hands of others, as I  await feedback. That left me with time, to contemplate my existential navel, and tweak an updated business plan. I'd tell you that I'm at a cross-road. But let's be clear – every week is a cross-road for me. Even with a business plan, I still have this feeling that I'm flying by the seat of my pants. Nothing wrong with that, I suppose. It means I'm using instinct.

I have discovered, when between major projects, it is healthy to take on smaller projects. As it turns out, I always need to create something. So...

Two pieces, that I made this week, had a retro eighties vibe – a Rubik's Cube (with my own color choices), and a Nintendo Gameboy (intended as a birthday present). A part of me truly never left the eighties, and this sometimes bleeds through into my concept work.

Keep on! Keep on!
Felt crafted Nintendo Gameboy
by Melissa Gaggiano


Tuesday, 30 October 2018

DIY Legend of Zelda Cosplay

{My Poppet link}
For the average ghosty it is that time of year – Halloween! But for some it's Halloween all year round. That's right! I'm talking about cosplayers. And for all you cosplayer wannabes I've written an article tailor made just for you. So head on over to My Poppet and read about my design journey when I made a Linkle cosplay outfit.

Friday, 8 June 2018

Garden Pixie, Painting and Burger

In a week of grey skies and antibiotics I created, and drew into my corner a few slices of colour.

Two of my designs appeared in this month's issue of Handmade magazine. And in fact my Sweet Garden Pixie made it onto the cover, with my name credit. How incredible!


Wanting to create some cheerful colour, I painted a canvas for my kids' bedroom wall. The painting is in fact of them. When my youngest saw the painting for the first time she laughed out loud – she likes it!

 Once the antibiotics started working I was able to put my mind into doing other things. I designed a felt (and crochet) burger. I am considering building on it by adding a drink and chips.


Monday, 12 March 2018

Feltie Foodie

© Melissa Gaggiano
I have been working on a small project the past two weeks. Want to know what it was? Using felt, thread and other random materials lying around the house I recreated some of the delicious food thingies that I'd been eating. Some of it healthy and some of it, pure and simple comfort food.

Can you tell just some of the things that have been on the menu?
- Carrots
- Bacon + egg, muffin
- Popcorn
- Apple
- Chicken drumstick
- Rice paper roll
© Melissa Gaggiano

Thursday, 1 March 2018

Magical Unicorn


A birthday party is coming up and the theme is Japanese cuteness – Kawaii! 

I decided to hand craft a couple of presents. The birthday girl loves Pusheen, a funny little cat circulating on the internet. So I made her a felt crafted Pusheen. I didn't stop there.

I wanted to add something else to the birthday package. So yesterday afternoon I designed and made this unicorn charm (also felt craft). Isn't she lovely? Isn't she super cute? Or I should say super kawaii.

Thursday, 16 November 2017

Twice the Magic

Handmade Issue 36-7
The latest issue of Handmade magazine has landed. In issue 36-7 you will find a smashing stash of enticing  Xmassie craft projects. In and amongst the creativity you will find two projects that I have produced. Check it out now at your local news agency and library.

© Melissa Gaggiano

Friday, 10 November 2017

Coffee Break, Masks and Other Challenges

In things that have been happening:


© Gwen Gaggiano
My eldest has offered to paint my portrait if I can go a month without drinking coffee. I'd love to have my portrait painted, but I don't know if I can sustain myself through caffeine withdrawal. I mean, my aim in life is to be less grumpy, and I can only imagine what the lack of caffeine might do. Perhaps the trick is to build it up – go one day without coffee, then have a coffee the second day. Two days without, one day with. Et cetera, et cetera!


Felt craft: The Legend of Zelda – Link with Bunny Mask;
Deku mask; Majora's mask.
My husband's birthday is just around the corner and I made him a headband. No, really!  I did. For a bit of context, years ago I made him a LOZ Link doll. Each year after that I make an accessory to go with the doll. So far I've made a Deku mask, and Majora's mask. This year I made the bunny headband mask. I'm thinking that one day we will need to build a treasure chest to store these pieces. Perhaps it can look like an actual LOZ chest.


© Melissa Gaggiano
My doll design development continues, as always. Working with armature, continued improvements to the pattern with each new doll. This week I have been exploring wig hair. Playing with a synthetic weft, as well as a needle felted hairdo. My next step is designing shoes and a crochet top for the blue haired doll. The crochet top is a massive challenge as I am experimenting with a super fine crochet hook and embroidery thread. Might work, might not! We'll see!

Tuesday, 26 September 2017

Plagg, Claws Out!

Well, look at that! There's a DIY Chat Noir costume over at My Poppet. Just in time for Halloween. One of the neat things about this costume is that it can easily come together with bits and pieces from around your home.

Wednesday, 9 August 2017

Wednesday, 7 June 2017

Flowery Felt Craft Project

My Poppet tutorial
© Melissa Gaggiano

How exciting is this! My Poppet Makes presents a freshly minted tutorial by moi. If you're into felt craft and flowers then this lil' treasure of a project is the perfect activity for you. Add this to your list of wee wonderful to make this year.


© Melissa Gaggiano

© Melissa Gaggiano

Friday, 26 May 2017

Twister

Melissa Gaggiano Photography
    On a complete and utter whim I made this mock Twister board game miniature for the girls doll house. They love it when I make little bits and pieces to add to their doll house, and this one was so simple in concept. As I was sewing the dots onto the white felt I realised how nice the pattern would look on a doll apron or skirt.

Thursday, 18 May 2017

Talk About... Pop Cactus

My Poppet tutorial


Talk about, pop cactus
Pop, pop, pop, pop cactus

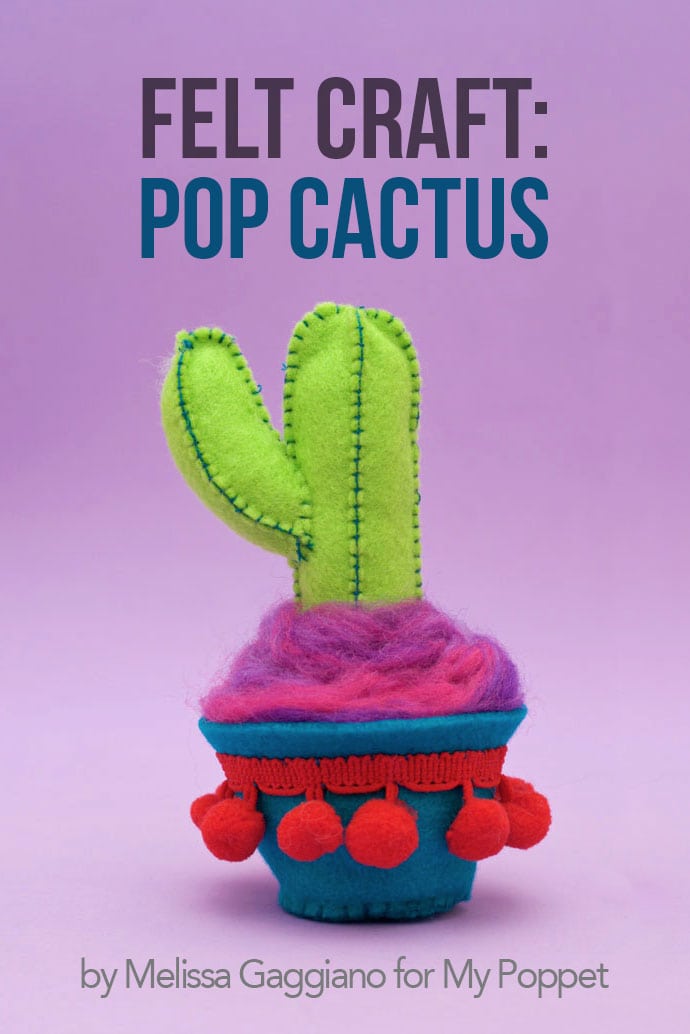
It's another proud day for me, as a new tute of mine is now available at My Poppet. If you love pop, felt craft and cacti then this is the perfect thing for you. Check it out now!