Friday, 18 December 2020
Weird + Wonderful Milk Plastic + Infinite Love
Thursday, 10 December 2020
The Twenty Twenty Crafting High Home Stretch
2020 is actually drawing to a close. It was a slow year, for sure. Yet somehow, as we see the New Year in sight suddenly a home run seems possible.
If however you're not feeling that home run I recommend taking time out from your troubles by giving yourself permission to rest, sleep, read, write, draw, craft, or anything you want. You can do it, and it will refresh your brain. Even if you think there's no time, give yourself five minutes. Just five minutes out of your day will make a lot of difference.
I've been whittling away the days producing some end of year projects, and exploring such products as the Cricut Joy and Bostik. In my field of work/play - play/work there is seriously a lot of cutting and gluing. Which, you know, I'm not complaining about, because this is what I do. But I can honestly say it's the sweetest pleasure when I get to operate tools and use materials that make the work process faster and more comfortable. #workingsmarter Am I right?
 |
| Making Christmas cards: with Cricut Joy and Bostik glue |
This week I experimented with making two very different Christmas cards, using the above mentioned Cricut Joy and Bostik tools and materials. The content is available on Youtube, in which I share my process, and some of my insights.
- Make a Cricut Joy Christmas card (with Bostik)
- Make a Summery Cricut Joy Christmas card (with Bostik)
If you wish to see more of my journey with the Cricut Joy, I have a dedicated page with links to my Youtube videos on the topic.
Plus, I've a bundle of festive, end of year craft projects for you to have a look at over at My Poppet, Kidspot.
 |
| My Poppet: Candy Cane Earrings |
 |
| Kidspot: Santa Tree Cone |
 |
| Kidspot: Teacher's Gift Box |
 |
| My Poppet: Orange Pomander Balls |
 |
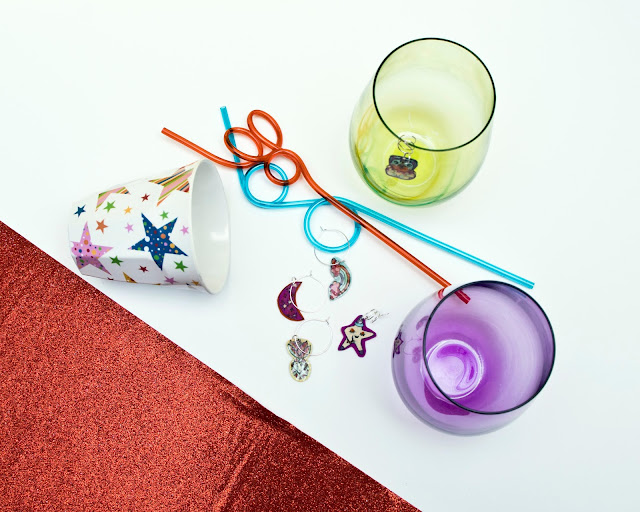
| Kidspot: Drink Glass Charms |
 |
| Kidspot: Bauble Wreath |
 |
| Kidspot: Confetti Bowl |
Friday, 30 October 2020
Secret Messages, Illusions + the Buffy Dilemma
The word is: Go! Go! Go! Kids are back in school. People are back on the streets. I've got projects galore. Let's check out my latest spate of projects that are all crafty and some that are science based.
 |
| Kidspot: Water Illusion |
 |
| Kidspot: Lemon Juice Secret Messages |
As for the something more crafty but no less magical you can try making your own kaleidoscope.
 |
| Kidspot: DIY Kaleidoscope |
I continue to document my journey as I teach myself how to use the Cricut Joy. My latest addition to the Cricut Joy library is now available to watch on YouTube.
For a bit of context, I am letting the kids watch Buffy the Vampire Slayer and the spin-off series Angel. We watch the shows sporadically and are prone to lose track of which show we are up to. When this happens there's a lot of backtracking with the DVDs. It's a dull mess really. I resolved the situation by creating a Buffy/Angel fridge magnet that can be flipped after we finish watching an episode. For this project I up-cycled an old fridge magnet. I scraped off the original advertising sticker from the magnet before applying the new Cricut Joy stickers.
 |
| Cricut Joy: The Buffy/Angel Fridge Magnet |
Friday, 9 October 2020
Cricut Book Art + Yarn Rainbows
 |
| {YouTube: Cricut Joy Book Cover Decoration} |
 |
| {Kidspot: DIY Yarn Rainbow} |
Friday, 25 September 2020
Almost Halloween + Finding the Joy
 |
| Kidspot: Ghost Witch |
 |
| Kidspot: Creepy Halloween Hand |
 |
| My Poppet Makes: DIY Mini Waffle Purse |
 |
| Kidspot: Rainbow Windsock |
Monday, 24 August 2020
Exploding Gifts, Keyrings + Matchbox Craft
 |
| {My Poppet: DIY Exploding Gift Box} |
 |
| {Kidspot: Matchbox Doll Craft} |
 |
| {Kidspot: DIY Shrink Plastic Keyring} |
 |
| {Eiffel Tower softie tutorial} |
Thursday, 23 July 2020
DIY Face Mask
 |
| {Kidspot: DIY Face Mask} |
Friday, 17 July 2020
Eiffel Tower Softie
G is well on her way toward being a Francophile, with her passion for The Miraculous Tales of Ladybug and Cat Noir. By extension of this passion she has a developing curiosity for anything connected to Paris.
A few weeks ago G produced a few Parisian structures using graph paper, tape and colouring pens. One of those structures, the Eiffel Tower, now sits on my computer workstation, a gift from G. My kids are a source of inspiration and wanting to do something for Sew a Softie in July 2020, I found myself staring at G's paper Eiffel Tower wondering what I would do. Then it struck me, I could make an Eiffel Tower softie based on G's Eiffel Tower.
What is Sew a Softie? For me, in a nutshell, it’s for people who believe they ‘can’t’. Sew a Softie is an open, friendly, supportive forum for absolutely everyone. There are no rules in making softies, except perhaps to say ‘there are no rules’. To make it more clear read about it in Trixi’s (founder of Sew a Softie) own words.
Sew your own Eiffel Tower softie
You will need:
· Felt: light blue, grey, light green; yellow
· Thread
· Hobby fill
· Pen
· Needle
· Scissors: Paper and fabric, or craft
Note:
When you're figuring out stuff there’s no right or wrong. There’s your way and my way, and neither are wrong. You can use any colour material and any type of thread. Use what’s available to you. Mix it up and have fun. If some materials are not available to you such as thread or hobby fill, there are alternatives to finishing the softie. Such as using rice or other dry grains to replace hobby fill. Or using glue instead of a needle and thread.
How to:
1/ Print the template at 100%.
2/ Cut out the template pieces with paper scissors.
3/ Place the template pieces onto felt fabric. Then trace around the pieces.
4/ Cut out the felt pieces with fabric or craft scissors. Cut mid length strips into the grass pieces. Cut out the middle section in the tower pieces.
5/ Place the grass piece onto the background piece, lining up the bottoms. Sew together, with a plain stitch across the bottom.
6/ Place the tower piece onto the background piece, lining up the bottoms. Sew together, using a plain stitch.
7/ Sew the frame piece over the tower just above the arch. Stitch together, with a plain stitch.
8/ Repeat Steps 5-7 for remainder three grass, background, tower and frame pieces.
9/ Sew the side edges of the four backgrounds together.
10/ Sew three of the base sides to the bottom edges of the background pieces.
11/ Stuff the Eiffel Tower with hobby fill.
12/ Sew closed the fourth side of the base to the background piece. Voila! You are done.
Wednesday, 1 July 2020
Keeping You Craft Busy
 |
| {My Poppet: Round Drawstring Bag Sewing Pattern} |
 |
| {Kidspot: Nappy Cake} |
 |
| {My Poppet project list} |
 |
| {Kidspot project list} |
Friday, 5 June 2020
Lights Camera Fashion – Kanari Pinku
Friday, 22 May 2020
Hacky sack + Heart Pillow + Freddie Prinze Jr
Friday, 8 May 2020
Felt Art + Marbling Design + Learning
 |
| Kidspot: DIY Felt Art Set |
 |
| My Poppet: DIY Marble Design Hat |
Saturday, 25 April 2020
Time to Repair, Make, Reflect
 |
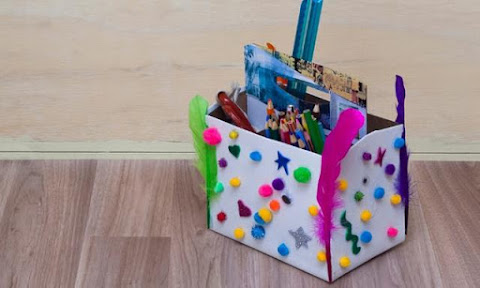
| Kidspot: Stationery Caddy |
Wednesday, 18 March 2020
Paper Craft Cherry Blossom Mobile Lantern
 |
| {My Poppet Makes link} |
 |
| Kidspot: Bunny Pop |
 |
| Kidspot: Jewellery Frame |
 |
| My Poppet: Collage Made Stationery Set |
 |
| Dover: Make in a Day |
and


